Thursday, 11 December 2008

Micro-Learning Induction Session

For this particular activity, I found it initially hard to keep to the KISS principle (Keep It Short and Simple) for an induction activity, despite having the instructions below :

Objective(s)

* To design an induction activity for new users to Second Life based on a set of identified competencies from the extended Global Kids Curriculum (GKDx)
* The GDKx is available here on the Simteach wiki
* http://simteach.com/wiki/index.php?title=GKCx

Have a look at GKCx, Level 1, Modules 1-4:
# Select a mission that you would like to develop from one of these modules.
# Imagine an educational activity or resource that takes into consideration the following aspects:

* Allows the development of the mission's powers
* Is engaging, playful
* Complies with the list of principles for an effective design of an orientation session.


The modules listed are:

* Avatar: Appearance
* Getting around: Walking and Flying
* Getting around: Taking a closer look
* Communicating: Chat


After a lot of thought and hesitation, I decided to create another avatar to help me 'feel' and experience the frustration of the newcomer to SL again.

Once I did that, I knew which area I wanted to work in : Appearance. This is the first thing that most people want to change, improve and customise. So, I based the micro-lesson on Level 1 Module Avatar: Appearance.

My own frustrations: I personally get frustrated, bored and 'blocked' with too many written instructions and explanations. They hinder rather than help. As 3D virtual environments are exactly that - visual and aural - I believe that a video tutorial is the best resource to use for a pre-induction session. It can be played again and again without the learner having to be in SL. Once they feel confident, they can go in-world and play.

Based on these principles : KISS and virtual/aural, here is the developed micro-lesson. The target audience is language learners :

Overview : Now that you have your avatar, you may want to change its appearance. Let's do exactly that and at the same time, revise adjectives, together with comparatives and superlatives to describe a person's appearance. Time to play!

Objective:

By the end of this activity,
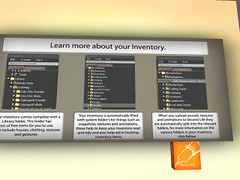
- You will be able to change your avatar's physical appearance using My Inventory, the pie menue.
- You will be able to change your avatar's clothes.
- You will be able to customise and switch the appearance of your avatar using My Inventory.

Process:
Before entering SL, watch this video and take notes if necessary. Watch it as often as you want.


Once you feel comfortable with the video content, enter SL, go to a sandbox where you can experiment (example: Warmouth 26.223.96 (PG) ) and follow the instructions below.

Mission :

When you opened your SL account, you chose an existing avatar with a set of clothes. I chose Online Gamer and male gender.

First, you're going to change the look of this avatar but not the clothes.

Physical Appearance

1. Make it shorter
2. Make it fatter
3. Change it's gender (male to female or female to male)

Saving your Avatar Shape

You can save multiple shapes and change them whenever you like.
To save a new shape:
1. Choose the Save As button below the sliders. A window will appear with a default name New Shape.
2. Double-click on New Shape and rename it with a name you'll remember! You will then be able to find it in your Inventory easily.

NOTE:
Eyes are saved as separate from both Shapes and Skins. Use the Save As button and give your eyes a great name!

Now, let's play a bit more with the eyes, mouth, skin to do the following

4. Make it older
5. Make it younger

Now, click 'Randomise' to see what happens. Continue to click, just for fun. Does the avatar appear stranger, more attractive?

As you change the avatar, save it so that we can all see your results in our group meeting later this week in SL.

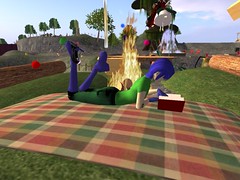
Here are the physical transitions of my Online Gamer avatar.


Clothes

As seen in the video tutorial, change your clothing, the colours and the textures. Once you are satisfied with your clothes, save the outfit or outfits.

Note
Save your look first

To save your current (or basic) look do the following:

  • Right-click your Avatar and choose "Appearance";
  • Choose "Make Outfit";
  • Give the outfit a folder name that you'll remember in the field provided at the top of the "Make Outfit" window;
  • Check all the parts of your appearance that you want to save to the folder (to save your complete avatar, check all available items)
  • Click Save.


See you in the next session with your own transitions :-)

Fin :-)

Tuesday, 2 December 2008

All about my avatar

Post in your blog a self interview with title 'All about my avatar: SL Name FamilyName" where you explain the history of your avatar(s), motivations, characteristics, main activities. Also describe the rhetoric behind your avatar: how did you build your avatar in relation of the effects you'd like to produce? Don't forget to mention your profile!

When I signed up for my account in 2006, it was pretty mind-boggling to decide on a name. Then I found the perfect fit - Busy Link! This still 'fits' me and my style of life!

When I first entered SL, I didn't really care about my avatar's appearance. I was more concerned about the basics - moving, following the others, following the instructions, getting to where I should be!

Then I played with my appearance. I love colours and this was important to me at the time and still is. I suppose I have not really changed my basic avatar's appearance a lot but I like it! Many 'experienced' Slers often say I should change my appearance in order not to appear as a 'newbie' but as I hate that term, I tend to like my avatar even more :-) That says a lot about me already ;-)

Gavin Dudeney was my first 'link' into SL in 2006 and when I got my first freebie T-shirt from Edunation, it was a horrible white colour but I was very happy to have it as without having to help Nicky and Gavin with their presentation for Global Learn Day X, I would not have been 'born' so soon. So, I like keeping that T-shirt (although now coloured green) as a 'thank you' to educators such as Gavin and Nicky and team who pioneered into SL and held their first conference there later in 2007. There weren't many attendees but the following year, there certainly were!

The purpose of being in SL will often illustrate the time spent (and required) in customising one's appearance. I chose what I would call a neutral appearance so I can move into different virtual environments without having to constantly change my appearance. The inventory is great to have the 'quick-change outfit' if necessary but I have rarely found this necessary to-date due to the basic one I chose.

I was very happy the other day when another avatar (very smart indeed) told me that my appearance was great - that convinced me to stay with my 'basics' :-) I might one day play with my facial features ..... if time is willing :-)

Sunday, 23 November 2008

Coming in to land - Activity 7


The objective of Activity 7 is " to raise awareness of the different options available to new users of MUVES (in this case Second Life) when learning about the environment and how to use it, and to develop an understanding of the different approaches currently available in SL."


Although I've been in and out of SL for a long time, I'm by no means an expert despite being put in Group 3 (What is an expert? I've been saying I'll go down to Group 2 since the beginning!) and so I decided to look around all four, rather than the required two :

* Orientation partly interactive, Virtual Ability (135, 124, 23)
* RL Student Orientation Area, Campus (172, 90, 24)
* NMC Orientation (107, 114, 39)
* Orientation Stations, Dore (32, 99)


Many comments have already been made about each of the four stations in the forum so, in order not to be repetitive, I'm going to give a brief overview here.

* NMC Orientation (107, 114, 39)

I particularly liked the posters with information clearly stated, the arrows on the ground and the free resources. This is a place one could come back to again and again for information.

I met nobody on the first visit but on the second visit, I met a pornographic sex queen and this is exactly what puts learners off virtual worlds. I took a lovely picture for prosperity... and then deleted it.

There are a lot of resources available on the island. However, each time I used a video, I was logged out of SL.

Camera Tutorial from NMC


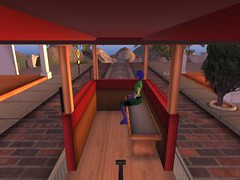
I really didn't know what the train was supposed to do and hopped on and off at the other end. Did I miss something?


* Orientation Stations, Dore (32, 99)


Orientation Stations, Dore was the second to be visited.


I didn't like this very much. I found the colours of dark brown and grey rather depressing. Again I met nobody and found it rather staid to just read posters. I didn't have to be in SL for that. In one room to practise moving an object, there was no ball to move!


* RL Student Orientation Area, Campus (172, 90, 24)

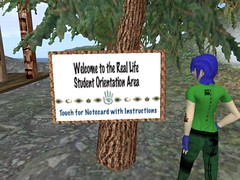
I loved the colours, sounds, builds and general 'lightness' of the RL Student Orientation Island
but really don't think that a newcomer to SL would be 'happy' there. The area was very restricted and very quickly, an avatar is locked in (or out) by fences which is not a nice feeling at all. The avatar can very quickly stray into the sandbox area without knowing it. Again, there was nobody to chat with or to get help from.


* Orientation partly interactive, Virtual Ability (135, 124, 23)


This island was full of posters to read ... and read ... and read ...What I did like was the star-like confetti which fell from the sky when I landed after my flying activity.


To conclude, I would suggest that a place looking like RL Student Orientation with the learning resources of NMC would be rather exciting for a newcomer to SL :-)

Tip : Generate your slurl here