I attended a few workshops but decided to write a report on Tere's session.
However, things were not to happen as I had planned!
I had read Tere's instructions in the wiki which were clearly laid out and well structured before the start of the workshop. Literally just before the session, I had updated the SL version on my computer.
I had teleported to her platform with the other participants, had rezzed my box as one of the first activities and then I was kicked out of SL. I managed to get in again only to be kicked out again. I tried all things and when I eventually got back in, everyone was back in the sandbox.
Well, at least I was there to ask my question :-)
The wiki instructions were very clear and I could complete the tasks from the written tutorial.
Thanks to Daf, I could follow her visual of the workshop and have added it here below from her blog
The ghost is me!
Tere´s Workshop for Muvenation - Daf's report on PhotoPeach
After hesitating to create a workshop to construct a house as a MUVEnation activity, Dafne and I decided to design a workshop to create a book and team teach.
Why? Because
"We think a book is a great visual resource for SL that can be used for many different purposes.
We want to use the book as the way to present the instructions for the workshop as a substitute of a slide projector.
We also would like to practice team-teaching which is normal practice in synchronous online environments, including SL. " Dafne's blog, overview in link below.
Muvenation Workshop: Creating a Book 1 on PhotoPeach
Further Preparations : We prepared the set up, layout and tested the material. After walking through the tutorial as a learner, there was one area which caused concern (Slide 8) but it was too late timewise to change the PPT slides. A book was made following the process of the tutorial as part of the pre-planning phase. This book was used as the sample 'end product' to be achieved in the session.
Synchronous online events lend themselves to team teaching if the target audience size requires it. I drew up a Team teaching Script so that we both knew when each should lead the tutorial. This is also essential should one tutor have technical problems, allowing the other tutor to continue the session. Although based on web conferencing, this article illustrates well how you can never fully be prepared for online events Case Study
Additional book making resources were added as an alternative.
During the workshop
Here are some snapshots I took during the session whilst tutoring and mentoring.
Here is a post session structured video
Worshop: Creating a Book - The session on PhotoPeach
Peer Evaluation This is the peer evaluation report by Tere Short. I must say that this is very kind as I am far more critical about it myself.
Observer 1 comments Daf Smirnov and Busy Link gave a workshop on "Creating abook" at the Muvenation Sandbox on 2Mar09.
I (Tere Short, a critical friend for this session) arrived about 15 mins in advance of the session and Daf and Moira were calmly checking last-minute details: if chat was heard in every corner of the platform and slightly repositioning a couple of slideboards and the book.
The layout was very nice, with big colorful boards on three sides of the platform containing the different content they were going to show. Everything was visible to everyone. There were several well positioned stools for participants to sit and work from during the session. Daf and Busy Link always stood to the side of whatever they were showing.
There were 8 participants: Alpha Torgsval, CorDeRosa Loire, Daffodil Fargis, Misy Ferraris, Morgen String, Sami2k Sideshow, SusNy Foss and me, Tere Short.
After Daf and Busy Link checked that everybody was sitting properly and facing them (they could rotate us in our seats), the session began. On time.
The session was delivered in voice, and participants commented and asked questions in the chat area, a few times in voice. It was a team-teaching venture.
Busy Link started the session by explaining the reason for a tutorial about a book, why they had chosen team teaching (it's collaborative and coopeartive work) and how a book could replace a presentation board. Then Daf showed examples of five different books.
This marked the end of the expository part of the session (about 10-15 mins) and the beginning of the "hands-on" part by participants, with Busy Link checking in advance, one-by-one, that everybody had all the necessary skills in the plan. We answered "yes" or "no" in the chat area.
Immediately before the "action" began for the participants, a folder with different materials, including a notecard with the instructions to be carried out, was given to all. We looked for it in the Inventory and had it ready to be used. Then we were asked to click a specific shelf to get a book each, which would be a working element, together with the materials in the folder.
The book is free and was given with full permissions, however, we were asked to remove all Properties (they explained how). Next we had to stretch and rotate the book (also well explained). Then we got a blue dropdown menu that allowed us to do several things, among them, open the book. We all did and then had to delete a specific texture in the Content (explained how step-by-step), open to folder in the Inventory and drag different textures into the Content of the book. Those textures corresponded to content and pages that we then turned back and forth. Finally, there was a texture for the cover and we got another blue dropdown menu with different colors to choose from. I should add that there was always a board with the text instructions as they were given in voice. Instructions were also available in the folder.
I hope to have described most of the process, because I wasn't able to carry it our at the same time as the others. I had problems. My book wouldn't move or stretch, only rotate. It opened, but wouldn't allow me to edit it: delete the texture and add all the textures that were in the folder. Mind you, I was doing everything correctly. Daf and Moira were very helpful and gave me different ways out, but nothing worked. It became frustrating for me and I knew it was influencing the timing, so I asked them to proceed.
In the meantime, I deleted the book, rezzed twice again, but always the same problem. I logged off and went back in, tried once again, but... the same. That's when I decided to rez a cube and see if it moved. It did. So I thought the problem was in the material given out. I deleted the folder and asked Daf if I could get another one. When I did, I read through the instructions to avoid missing a step and everything worked at once. Eureka! I ended up catching up the others, except for something about the cover, though I did change its color. This decision made me feel good, because we cannot just stop and fold our arms when in trouble. Perseverance worked!
Daf and Busy Link's session was very well planned and delivered. They were very clear in their instructions, helped whenever asked and kept a good pace throughout, in spite of some minor problems that some participants had. They saw all the books and took snapshots. There was time for Q&A, as planned, and for suggestions about how to use a book inworld: a collaborative writing project, a tutorial, a documentation about something with snapshots taken inworld, telling stories, a SL diary of students, a fashion magazine, a personal portfolio, a project. Soon the 90-100 mins were up.
Transfer of learning worked perfectly, because everybody was able to carry out the plan and show their final product. And this end product is of great relevance, since it can be edited and used in so many different ways.
Team teaching worked very well. Both had the tasks well distributed and were always very calm and helpful. Help was immediately given by one or the other. Is there a better way to delive this content? Who am I to say? I'm still very much a newbie. But all I can say is that all participants were very happy, as can be seen in some of the very nice comments: "it was really succesful", "You managed to help all of us and the good idea to work as a pair helped a lot", "very useful and perfectly managed", "we could ask for help without feeling intrusive", "great materials, very nicely laid out, very well balanced between you two, good pace, both very calm and very helpful - a great workshop!"
Tere Short / Teresa Almeida d'Eça (3Mar09)
Post Workshop Comments
In the space allocated for the workshop in the sandbox, we had to omit certain books or make them smaller. We decided to eliminate some display books rather than reduce the size of the visuals. Also, one sample book was malfunctioning and we decided not to include this in the display.
Whilst presenting the books, participants were turning the pages which meant that I was not speaking about the page I wanted to.In the future, these should be locked to one presenter once the examples are in place to avoid this.
The difficulties in the instructions for the front cover experienced in the pre-session trials were indeed experienced by the learners. A little tweak in the PPT would have solved this problem. We didn't take the time to so it :-(
To avoid colour clashes, the book sample cover should be given with a white colour and not blue. However, as participants need to click on the frame to open the book, a colour difference is required as a visual aid.
In order to prepare the workshop, we left the sample book unlocked. This then led to weird distortions of the book as participants were turning the pages (and perhaps other things) and final freezing and I had to take it away. Daf observed later that this had happened to her before.
Just minutes before the start, we observed that permissions must be taken off the book samples as soon as they were rezzed by the participants to avoid problems.
For some unknown reason, one participant could not open their tools in the notecard. Still a mystery.
With these little hiccups, we stayed calm and delivered the workshop. When I was sorting out our book, Daf continued communicating with the participants. I nearly squashed her avater when I rezzed the book again ;-) Another reason why team teaching and technology go hand-in-hand here.
Final Comment The participants seemed to enjoy and appreciate the workshop but it definitely needs tweaking and fine-tuning. This is good material for a future and more developed workshop.
Yet another workshop I attended as part of the MUVEnation activities.
I loved this tutorial! It was so organised, well planned and structured with lots of visuals to help the participants along in each step.
I realised that I would have to brush up on my Photoshop skills to complete the tutorial in real time and this appeared to be the reaction of quite a few of the participants. Whilst some were creating, others were watching.
What I particularly liked was the activity towards the end of the session. We all had to wear and critically analyse a blouse. This activity brought the 'non-active' participants back into the 'game' and we all had our blouses on!
The second workshop I attended was Building a Cottage on Tuesday 5 February 10-11 SL, NCI - Boomer Island, Tutor - Sally Savard.
Activity Basic Building Range Beginners
1. Workshop design: planning and preparation
1.1 Spatial design and layout
How is the virtual physical space for delivering the workshop designed and utilised ?
Addressing pragmatics of SL environment Each participant was allocated a building area.
1.2 Instructional design To what extent are the learning objectives, outcomes and goals organised ?
Structured
1.3 Organisation of instructions and discourse To what extent are the instructions and discourse organised in advance ?
Pre-prepared
1.4 Physical organisation of learning material In what form are the learning materials
made available to the participants ?
Structured folder(s) and givers devices
1.5 Business model What is the economic model for learner participation ?
Free with tip box
1.6 Maturity level | Development version What is the maturity level of the workshop and its life cycle?
Fully tested
1.7 Comments about planning and preparation:
The majority of participants had problems with the construction and did not complete the activity in the time given, therefore some fine-tuning required.
2. Workshop implementation: delivery of instruction
2.1 Assessment of prior/required knowledge Is prior knowledge assessed? If so, how is it assessed?
Informal assessment
2.2 Pre-prepared activities to meet the knowledge requirements What type of pre-workshop activities have been planned to meet the knowledge requirements?
None
2.3 Prior knowledge How is prior knowledge recalled and connected to the workshop activities?
On demand
2.4 Preparation of user interface and viewing controls To what extent are the instructions organising the client user interface and camera controls given ?
No instructions
2.5 Technical preparation of participants What technical advice and background information are provided?
Instructions cover different technical issues
2.6 Conversational flow How is the conversational flow structured between tutor and learners ?
Ordered and controlled progressively, instructions and Q/As 2.7 Communication dynamics What are the dominant communication dynamics during the workshop?
Tutor <-> Learner , Learner<> Learner 2.8 Movement of learners and teachers How are the the movements of participating
avatars in the learning space?
Constrained sit/position for learners and free movement for teachers
2.8 Presentation of outputs and results How are the expected outputs and results presented ?
Illustrated at varying stages of development
2.9 Delivery of learning material How are the learning materials given to learners ?
At the beginning using automated tools and scripts
2.10 Use of tools to deliver both content instruction What tools are used to deliver to content instruction to learners ?
Presentation tools
2.11 Use of media to enhance teaching What type of media are used to enhance/enrich the teaching/learning experience ?
Basic use of SL text chat and sense of virtual embodiment
2.12 Concurrent learner activity What type of concurrent learner activity is promoted ?
Activity exclusively centred within the 3D world
2.13 Personalisation of learning What type of activities are implemented to
individualise the learning experience?
Adaptive pathways Q/As 2.14 Pedagogical approach What are the relevant aspects of the learning and teaching approach ?
Directive/Procedures/Results oriented
2.15 Comments about planning and preparation:
It was clear that the pace was too fast for partcipants apart from 2 or 3 who were totallt at ease with the process.
3. Implementation of the workshop : follow up and evaluation
3.1 Provision of guidance, support and feedback How does the tutor provide support and feedback to the learners ?
On demand via main communication channel or back channels
3.2 Monitoring of student progress In what from does the tutor monitor student progress?
Gathering of informal feedback and observation of creative process 3.3 Quality of feedback What is the nature of the feedback ?
Informative
3.4 Assessment model What is the assessment model ?
Informal assessment
3.5 Comments about follow up and evaluation:
4. Implementation of the workshop : recall and transfer of learning
4.1 Recapiltulation In what form is the revision of key concepts and procedures addressed?
Semi systematic
4.2 After session resources What kind of resources are madeavailable at the end of the session ?
Individual artifacts
4.3 After session activities What type of post workshop activity has been planned?
None
4.4 Comments about recall and transfer of learning:
The majority of participants experienced difficulties at some stages. The tutor stayed on after the class to help further. This tutorial was fast in pace, demanding at times more than the basic building skills. More step-by-step instructions and visuals are needed to guide the learners through the stages, especially for the door and roof building steps.
The first workshop I attended was SL Basic Building on Tuesday 3 February 10-11 SL, NCI - Boomer Island, Tutor - Sally Savard.
Activity Basic Building Range Beginners
1. Workshop design: planning and preparation
1.1 Spatial design and layout
How is the virtual physical space for delivering the workshop designed and utilised ?
Addressing pragmatics of SL environment
1.2 Instructional design To what extent are the learning objectives, outcomes and goals organised ?
Structured
1.3 Organisation of instructions and discourse To what extent are the instructions and discourse organised in advance ?
Pre-prepared
1.4 Physical organisation of learning material In what form are the learning materials
made available to the participants ?
Structured folder(s) and givers devices
1.5 Business model What is the economic model for learner participation ?
Free with tip box
1.6 Maturity level | Development version What is the maturity level of the workshop and its life cycle?
Fully tested
1.7 Comments about planning and preparation:
The participants were seated in a semi-circle, facing the instructor, who was standing in front of a large slide presenter, all within range, therefore not too demanding on camera control skills. The workshop was very structured, with plenty of visuals to help participants.
2. Workshop implementation: delivery of instruction
2.1 Assessment of prior/required knowledge Is prior knowledge assessed? If so, how is it assessed?
Informal assessment
2.2 Pre-prepared activities to meet the knowledge requirements What type of pre-workshop activities have been planned to meet the knowledge requirements?
None
2.3 Prior knowledge How is prior knowledge recalled and connected to the workshop activities?
On demand
2.4 Preparation of user interface and viewing controls To what extent are the instructions organising the client user interface and camera controls given ?
No instructions
2.5 Technical preparation of participants What technical advice and background information are provided?
Instructions cover different technical issues definition and identification of prim
2.6 Conversational flow How is the conversational flow structured between tutor and learners ?
Ordered and controlled progressively by behavioural rules, interaction policies, textual codes, scripted objects and communication tools plus Q/As
2.7 Communication dynamics What are the dominant communication dynamics during the workshop?
Tutor <-> Learner
2.8 Movement of learners and teachers How are the the movements of participating
avatars in the learning space?
Constrained sit/position for learners and free movement for teachers
2.8 Presentation of outputs and results How are the expected outputs and results presented ?
Illustrated at varying stages of development
2.9 Delivery of learning material How are the learning materials given to learners ?
At the beginning using automated tools and scripts
2.10 Use of tools to deliver both content instruction What tools are used to deliver to content instruction to learners ?
Presentation tools
2.11 Use of media to enhance teaching What type of media are used to enhance/enrich the teaching/learning experience ?
Basic use of SL text chat and sense of virtual embodiment
2.12 Concurrent learner activity What type of concurrent learner activity is promoted ?
Activity exclusively centred within the 3D world
2.13 Personalisation of learning What type of activities are implemented to
individualise the learning experience?
Adaptive pathways Q/As
2.14 Pedagogical approach What are the relevant aspects of the learning and teaching approach ?
Directive/Procedures/Results oriented
2.15 Comments about planning and preparation:
Very organised and structures, leaving nobody behind.
3. Implementation of the workshop : follow up and evaluation
3.1 Provision of guidance, support and feedback How does the tutor provide support and feedback to the learners ?
On demand via main communication channel or back channels
3.2 Monitoring of student progress In what from does the tutor monitor student progress?
Gathering of informal feedback, observing learner creations
3.3 Quality of feedback What is the nature of the feedback ?
Informative
3.4 Assessment model What is the assessment model ?
Informal assessment
3.5 Comments about follow up and evaluation:
4. Implementation of the workshop : recall and transfer of learning
4.1 Recapiltulation In what form is the revision of key concepts and procedures addressed?
Semi systematic
4.2 After session resources What kind of resources are madeavailable at the end of the session ?
Individual artifacts
4.3 After session activities What type of post workshop activity has been planned?
None
4.4 Comments about recall and transfer of learning:
A good revision activity for me, I got some tips.
For this activity, we had to build a tree in SL. But not just a normal common or garden tree but one as per an activity "inspired from the Second Life Manual for creative thinkers and designers created by Ian Truelove, Graham Hibbert and Steven Warburton. The Manual has been elaborated, in its RL edition, by a team from the Art and Design School of the University of Leeds Metropolitan." The choice of tree ranged from a geometree, poetree to a surrealistic tree, naughty tree .... to name but a few. I like this approach - after all, this is a major feature of a virtual world: enabling creativity. But how?
This was a first build for me and once I got into it, I thoroughly enjoyed it but actually starting it was another thing. Where to start? Well, I started with a cylinder for the trunk. I couldn't imagine building further with the standard plywood texture, so I searched for a texture in my Inventory and found one I liked. However, despite the texture which I chose for both its visual colours and 'virtual' tactile quality, it seemed a little dull. I had a colourful trunk but how was I going to proceed to the natural continuation of a branch? I didn't find any information through my web searches on how to build a tree from scratch. Of all the sites I searched, I fell upon and really liked Dr Curtis's site. It is clear, attactive, visually pleasing and short and simple. I'd recommend it as a resource for the co-writing activity in this module. I applied lighting and the result is the above picture.
I created a double trunk and twisted it.
I started playing with other prims, features, textures and sculpting. Once I'd played a lot and discarded many, I concentrated on the positioning of the 'leaves' which requires good camera controls.
Then came the linking of the leave prims to the trunks. I quickly found that once I'd linked many individual prims, I didn't know how to edit an individual prim within the linked object. Also, once linked as an object, if I moved it slightly, one prim was not positioned correctly vis-Ã -vis the trunk. Arrgh!
So, I then took the approach of making 'mini' linked objects: positioning them, attaching them, changing the angle, and then linking them all together as an object.
I often sat at the top, thinking about my tree .... and it eventually became the "Thinking Tree".
Due to the way I built the leaves, it has two sections, making use of the double trunk. One section is what I call the 'Peacock Look' and the other is called the 'Flower Look'.
I definitely need a master builder to help me to build in flexibility here. With the lack of knowledge, I felt that I had to know exactly what and how I wanted to create before building. Surely this is not the case as the virtual world invites creativity? Let's see what the master builders have to say.
I then created two notecards, one using the autoscript recommended in the above mentioned resource.
As I approached the end, I realised that the plane of one trunk was still the plywood texture and no matter what I tried, I could not change its individual texture. At this point, I was coming to the end of my build and did not want to disrupt it. Ideally, I would have liked to have integrated a seat in a natural continuity using a blending texture. Another point which I hope the master builders will help me with.
Then it was time to plant. Frustration - after all that work, I could not plant it at the designated site. I was member of Group 3, and the Mentors Group but I could not plant with either of them activated! The problem was solved through the moodle forum and once I was member of a general group, I could plant!
I thoroughly enjoyed the experience of my first build and should continue to build otherwise I'll forget the little building skills I have acquired.
Come by and sit on the "Thinking Tree" and enjoy the scenery!
* To collect, describe and comment on a number of tools that are suitable for teaching and learning in Second Life based upon a chosen theme * To design an experience-based, interactive and playful activity for a teacher to discover to discover these tools in Second Life, such as creating a tour guide.
For Module 1, section 3, activity 6 : select tools to teach in SL.
* Delivery of learning material * Communication and interaction * Cooperation * Creation of content * Individualisation of learning paths * Assessment, feedback and tracking * Self-organisation and group-organisation * Reflection and meta cognition
To analyse teacher perceptions about avatar appearance and professional teacher identities in Second Life
To consider student perceptions of appearance in Second Life teaching settings
After looking at all the listed resources and reading the posts in the forum, here are my thoughts on the following :
* Do you think avatar appearance is an important aspect of educational activities that are being undertaken in Second Life? Context, context context. SL begs out for that response because it is virtual. In the classroom, the real life physical presence demands by its nature that the educator be aware of the surroundings, context, culture and present himself/herself appropriately to the audience. Why should SL be different in a teaching/learning environment? * What does appearance say about us in a teaching situation in Second Life - to what degree is it the same as real-life? There are teaching situations which I will not accept in RL, so it is therefore normal that they will certainly not be present for my avatar in SL. This also applies to appearance. * What is an appropriate professional avatar appearance for education? Context-dependant again :-) The teaching context in real life imposes a certain 'appearance' which is linked to the teaching/business environment and the cultural context. * Does your avatar have a professional appearance for educational contexts? Yes, no? Why? No, as I don't teach in SL but if I did, my avatar is appropriate as it is today. It is after all, an exaggerated form of myself I suppose. * Is there any appearance you would never use to teach in Second Life and why? I would never use highly provocative, low-cut and sexy attire as a female avatar. I don't in teaching contexts in RL so why would I do this in SL, apart from a specific role-play. * The ability to change avatar appearance could be described as an affordance of Second Life. How can the ability to alter avatar appearance be used as a teaching tool? Very easily - in role plays, scenarios, you name it. I think this is a very strong point for SL and teaching in SL. It's easy and quick, once learners have gone through the basics.
"Lastly, after the event, you should write a review of the event. You could focus on the fashion, and the different tendencies, or think about identity and appearance, or look at it from a social point of view."
One of my first experiences in SL was to dance. I remember distinctly the day! It was a Sunday afternoon and I was boogying in front of my screen as my avatar went through the paces. Graham Stanley then gave me more files (he obviously recognised the disco-kid in me) and I just went wild trying them all out.
My passion for this in SL has not changed today! I thoroughly enjoyed dancing at the Fashion Show, just as if I was dancing in a disco. I've tried to capture the movement in the snapshots here.
In my workplace, real fashion shows often take place and the most spectacular and interesting moments are 'off-catwalk' rather than 'on-catwalk'. So I decided to focus on the socialising, the informal settings, the different groupings and conversations going on during the event as the 'model' avatars waited to be called upon to present their outfit or they just looked on. In SL, I could'nt see them doing their hair and putting on the make-up though :-(
For this particular activity, I found it initially hard to keep to the KISS principle (Keep It Short and Simple) for an induction activity, despite having the instructions below : Objective(s)
* To design an induction activity for new users to Second Life based on a set of identified competencies from the extended Global Kids Curriculum (GKDx) * The GDKx is available here on the Simteach wiki * http://simteach.com/wiki/index.php?title=GKCx
Have a look at GKCx, Level 1, Modules 1-4: # Select a mission that you would like to develop from one of these modules. # Imagine an educational activity or resource that takes into consideration the following aspects:
* Allows the development of the mission's powers * Is engaging, playful * Complies with the list of principles for an effective design of an orientation session.
The modules listed are:
* Avatar: Appearance * Getting around: Walking and Flying * Getting around: Taking a closer look * Communicating: Chat
After a lot of thought and hesitation, I decided to create another avatar to help me 'feel' and experience the frustration of the newcomer to SL again.
Once I did that, I knew which area I wanted to work in : Appearance. This is the first thing that most people want to change, improve and customise. So, I based the micro-lesson on Level 1 Module Avatar: Appearance.
My own frustrations: I personally get frustrated, bored and 'blocked' with too many written instructions and explanations. They hinder rather than help. As 3D virtual environments are exactly that - visual and aural - I believe that a video tutorial is the best resource to use for a pre-induction session. It can be played again and again without the learner having to be in SL. Once they feel confident, they can go in-world and play.
Based on these principles : KISS and virtual/aural, here is the developed micro-lesson. The target audience is language learners :
Overview : Now that you have your avatar, you may want to change its appearance. Let's do exactly that and at the same time, revise adjectives, together with comparatives and superlatives to describe a person's appearance. Time to play!
Objective:
By the end of this activity, - You will be able to change your avatar's physical appearance using My Inventory, the pie menue. - You will be able to change your avatar's clothes. - You will be able to customise and switch the appearance of your avatar using My Inventory.
Process: Before entering SL, watch this video and take notes if necessary. Watch it as often as you want.
Once you feel comfortable with the video content, enter SL, go to a sandbox where you can experiment (example: Warmouth 26.223.96 (PG) ) and follow the instructions below.
Mission :
When you opened your SL account, you chose an existing avatar with a set of clothes. I chose Online Gamer and male gender.
First, you're going to change the look of this avatar but not the clothes.
Physical Appearance
1. Make it shorter 2. Make it fatter 3. Change it's gender (male to female or female to male)
Saving your Avatar Shape
You can save multiple shapes and change them whenever you like. To save a new shape: 1. Choose the Save As button below the sliders. A window will appear with a default name New Shape. 2. Double-click on New Shape and rename it with a name you'll remember! You will then be able to find it in your Inventory easily.
NOTE: Eyes are saved as separate from both Shapes and Skins. Use the Save As button and give your eyes a great name!
Now, let's play a bit more with the eyes, mouth, skin to do the following
4. Make it older 5. Make it younger
Now, click 'Randomise' to see what happens. Continue to click, just for fun. Does the avatar appear stranger, more attractive?
As you change the avatar, save it so that we can all see your results in our group meeting later this week in SL.
Here are the physical transitions of my Online Gamer avatar.
Clothes
As seen in the video tutorial, change your clothing, the colours and the textures. Once you are satisfied with your clothes, save the outfit or outfits.
Note Save your look first
To save your current (or basic) look do the following:
Right-click your Avatar and choose "Appearance";
Choose "Make Outfit";
Give the outfit a folder name that you'll remember in the field provided at the top of the "Make Outfit" window;
Check all the parts of your appearance that you want to save to the folder (to save your complete avatar, check all available items)
Click Save.
See you in the next session with your own transitions :-)
Post in your blog a self interview with title 'All about my avatar: SL Name FamilyName" where you explain the history of your avatar(s), motivations, characteristics, main activities. Also describe the rhetoric behind your avatar: how did you build your avatar in relation of the effects you'd like to produce? Don't forget to mention your profile!
When I signed up for my account in 2006, it was pretty mind-boggling to decide on a name. Then I found the perfect fit - Busy Link! This still 'fits' me and my style of life!
When I first entered SL, I didn't really care about my avatar's appearance. I was more concerned about the basics - moving, following the others, following the instructions, getting to where I should be!
Then I played with my appearance. I love colours and this was important to me at the time and still is. I suppose I have not really changed my basic avatar's appearance a lot but I like it! Many 'experienced' Slers often say I should change my appearance in order not to appear as a 'newbie' but as I hate that term, I tend to like my avatar even more :-) That says a lot about me already ;-)
Gavin Dudeney was my first 'link' into SL in 2006 and when I got my first freebie T-shirt from Edunation, it was a horrible white colour but I was very happy to have it as without having to help Nicky and Gavin with their presentation for Global Learn Day X, I would not have been 'born' so soon. So, I like keeping that T-shirt (although now coloured green) as a 'thank you' to educators such as Gavin and Nicky and team who pioneered into SL and held their first conference there later in 2007. There weren't many attendees but the following year, there certainly were!
The purpose of being in SL will often illustrate the time spent (and required) in customising one's appearance. I chose what I would call a neutral appearance so I can move into different virtual environments without having to constantly change my appearance. The inventory is great to have the 'quick-change outfit' if necessary but I have rarely found this necessary to-date due to the basic one I chose.
I was very happy the other day when another avatar (very smart indeed) told me that my appearance was great - that convinced me to stay with my 'basics' :-) I might one day play with my facial features ..... if time is willing :-)
The objective of Activity 7 is " to raise awareness of the different options available to new users of MUVES (in this case Second Life) when learning about the environment and how to use it, and to develop an understanding of the different approaches currently available in SL."
Although I've been in and out of SL for a long time, I'm by no means an expert despite being put in Group 3 (What is an expert? I've been saying I'll go down to Group 2 since the beginning!) and so I decided to look around all four, rather than the required two :
Many comments have already been made about each of the four stations in the forum so, in order not to be repetitive, I'm going to give a brief overview here.
* NMC Orientation (107, 114, 39)
I particularly liked the posters with information clearly stated, the arrows on the ground and the free resources. This is a place one could come back to again and again for information.
I met nobody on the first visit but on the second visit, I met a pornographic sex queen and this is exactly what puts learners off virtual worlds. I took a lovely picture for prosperity... and then deleted it.
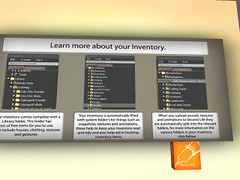
There are a lot of resources available on the island. However, each time I used a video, I was logged out of SL.
Camera Tutorial from NMC
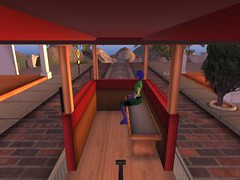
I really didn't know what the train was supposed to do and hopped on and off at the other end. Did I miss something?
* Orientation Stations, Dore (32, 99)
Orientation Stations, Dore was the second to be visited.
I didn't like this very much. I found the colours of dark brown and grey rather depressing. Again I met nobody and found it rather staid to just read posters. I didn't have to be in SL for that. In one room to practise moving an object, there was no ball to move!
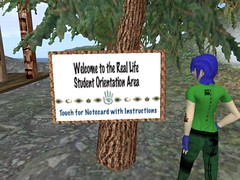
I loved the colours, sounds, builds and general 'lightness' of the RL Student Orientation Island but really don't think that a newcomer to SL would be 'happy' there. The area was very restricted and very quickly, an avatar is locked in (or out) by fences which is not a nice feeling at all. The avatar can very quickly stray into the sandbox area without knowing it. Again, there was nobody to chat with or to get help from.
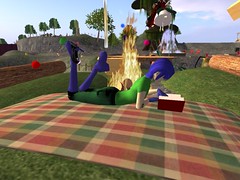
This island was full of posters to read ... and read ... and read ...What I did like was the star-like confetti which fell from the sky when I landed after my flying activity.
To conclude, I would suggest that a place looking like RL Student Orientation with the learning resources of NMC would be rather exciting for a newcomer to SL :-)